

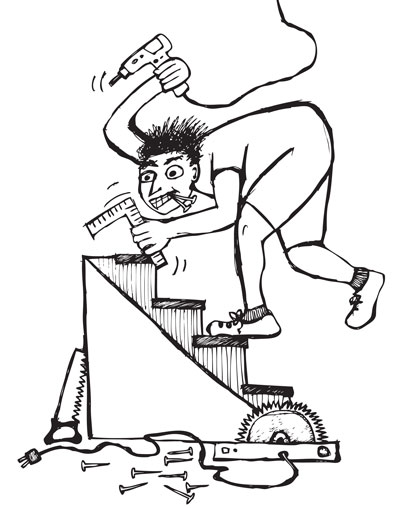
Dave Sullivan builds you some stairs.
Having trouble reaching that beer on the upper shelf?
Well, by’, you’re in luck, I’m currently enrolled in an education program at MUN that teaches ME how to teach CHILDREN Skilled Trades, and now I’m gonna teach YOU how to build a set of stairs.
(Why am I YELLING?)
Glossary
Individual Rise: the height between each stair.
Tread: The part you puts you’re smelly old foot on.
Individual Run: The width of each individual tread.
Stringers: The diagonal pieces of wood that hold your treads and frame you’re steps. You’ll know ‘em to see ‘em.
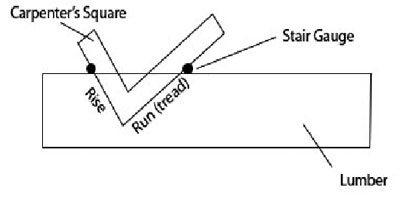
Stair Gauge: Two little doohickeys that you use to mark the measurements of your individual rise and run then screw onto your carpenter’s square.
Nosing: That part of the stair you trip up on when you come home loaded at your mudders. It pokes out like a big old snotbox.
The Bare Necessities
1 carpenter’s square
1 set of stair gauges
3 8’ lengths of 2×8
1 crosscutting hand saw
1 circular saw
Wood screws
Power drill with Robertson bit
1 measuring tape
Like the great Montel Jordan once said… “this is how we do it.”
First thing’s first. The code. It’s important to follow the code when constructing anything.
What’s the most important code of stair construction?
Two words: individual rise. The standard individual rise in Newfoundland and Labrador is in the vicinity of 180mm. It’s funny but most people only lift their feet 190mm when traveling a flight of stairs… I read that… in a book… no big deal… just readin’… dat’s all.
So let’s say our stairs are 800mm high and, 610mm wide.
Are you ready for some math!? I AM!
Stair Math
800mm ÷ 180mm = 4.44… (make that 4.4 steps in our stairs)
800mm ÷ 4.4 = 181.81mm (round that up to 182mm)
Individual Rise = 182mm x 4 steps
So we have to make four steps with each step’s rise equaling 182mm and we’ve decided to use 2×8 for our tread so each tread will be just under eight inches in width… or roughly 203mm. We’ll also be adding nosing to our stairs so there’s going to be an inch space in between the rise and the run to allow for a lip on the end of our tread.
The first thing you need to wrap your head around is that when you are asked to build stairs with four steps you only actually build three. The fourth step is the floor you’re descending from. Fried hey? Just think about it for a sec… it starts to make sense after a while.
Step 1
Measure the run on your carpenter’s square then screw in your stair gauge to mark the measurement. Now do the same for the rise. So for us it’s going to be 182mm and 203mm respectively.
Step 2
Lay out your wood (ha!) on a flat surface. Place the square upon the wood keeping the stair gauges flush to the edge. Now mark out the triangle it creates. Move to the end of the triangle and repeat three more times. Making four total triangles. Go back to the top step (first triangle) and extend your first 182mm line to the end of your wood.
Step 3
Go to the bottom of your stairs. Take a piece of 2×8 turn it on its side (the 2” side) and lay it parallel to your final tread. Now mark a line straight to the end of the wood. When building stairs its important to take into account the thickness of the tread your laying, as it can throw off you’re rise, in this case the 2” thickness of our wood would totally shag our plans for a 182” rise.
Step 4
Take your circular saw and cut the top line you’ve drawn across the wood, and then the bottom line you’ve drawn across the bottom with the two” part of your 2×8. Lastly, cut to about an inch from the corner of each triangle on either side. Then take your handsaw and cut out the triangle. Circular saws were never meant for precision work… so don’t even attempt it. Once done cutting out the triangles, repeat on another piece of 2×8.
Step 5
Cut out three pieces of 2×8 to a length of 610mm each. Measure a space an inch from the back of each tread (or run) and then screw your treads into your stringers. Making sure they’re flush on either side of said stringer.
Step 6
Sit back, relax, have a beer—YOU JUST BUILT STAIRS. You may want to attach them to something and call a friend to test them.

Illustration by Kira Sheppard.
Know how to do something and want to share it with the world? Drop us a line at diy@thescope.ca.






August 14th, 2008 at 11:22 am
As always, great article. People often underestimate how simple DIY stairs can be.
“You may want to attach them to something and call a friend to test them.” – Classic!
FYI, we have a “Stair Calculator,” here: http://www.goproconstruction.com/helper2.html
Keep up the good work,
-Matt
GoPro Construction
December 9th, 2008 at 10:54 pm
Building stairs is actually not easy at all. I mean building them the right way is very hard. Nailing a bunch of pieces of wood can be easy.