

Archive | DIY RSS feed for this section
DIY micropublishing

I’ve only ever made two 24 page mini-comics, but that’s a good start, and I love doing it. I used to make homemade colouring and puzzle books as presents when I was a kid, so I suppose I was onto something all those years ago.
I’d been wanting to make a mini-comic for a long time, but the thing that made me do it was the San Diego Comic Convention last summer. I wanted to have something to give away to the comic writers I was hoping to meet and buy stuff from. When I went to the Toronto Comic Arts Festival, Mr. Mini-Comic Number Two was born. I thought it would be nice to be able to say, “Can I give you a copy of my mini-comic?” instead of just, “Hi, I like your comic.” It helped a bit, but I still need to work on my real-life social networking skills.
So far, I’ve played things safe with cardstock, computer paper, screen-printing, and staples. I’ve seen some very nice books done in accordion style, or stitched and Gocco-printed, with sleeves, incorporating anything from fancy paper, cardboard, wood, bark, Mylar, to old board game boxes. If you can draw on it, you can use it. Know any good origami moves? Go to town! Can you cross-stitch in glorious 8-Bit? Then you may be my hero. Buddy’s got a button machine? Butter him up, brother.
The most important thing, though, is to plan your project carefully. Winging these things usually leads to frustration, so make a little model of your book, number every page, and then when you take it apart to make copies so you can see which pages will have to be next to each other.
Then comes the most difficult part: Draw! Write! Then make a cover that is both eye catching and not boring. For inspiration, be sure to read plenty of other mini comics, artist books, and zines, and Google ‘making mini-comics.’
Once you’ve finished creating, scan, photocopy, resize, cut & paste or use image editing software to reformat your pages. Then reproduce them via printer or photocopier. Get some pals to help you collate or bind your books, but be sure to use good, heavy-duty staples if you go that route. If you are so inclined, it’s cool to make inserts, coupons, stickers and buttons to slip inside.
Finally, you have to promote, distribute, and network. Share your work with friends, galleries, libraries, comic shops, conventions and coffee shops so others can see what you’ve done. Budget for some trades and give-aways. (The standard for pricing is $1 per 10 pages.)
My Best Tips So Far:
• Draw bigger than you normally would, that if you shrink it all down people will be able to see your work. For example, if you are going to make a comic that well end up ¼ the size of an 8.5×11 piece of paper, write your words four times as big.
• Give yourself lots of time and plan for errors at the photocopy place. Start with a manageable amount of copies for your first run (25-50); you can always get more printed later. Don’t overwhelm yourself either; start with a small number of pages (<24).
• And, like pretty much any other art form, make sure you’re doing it for fun.
Links To Get You Going:
Your Comics Will Love You Back by Alec Longstreth. This was a lecture he gave at the Center for Cartoon Studies (2008). I met Alec briefly at TCAF and he traded comics with me! He also has a huge beard.
www.alec-longstreth.com/comics/comics_love/
This is a good illustrated demo of how to construct minicomics, but I don’t know who the author actually is. www.caption.org/2002/minicomics/
Liz Baille makes tonnes of comics and you can subscribe to her Minicomic of the Month Club, which is awesome because you get real mail. www.lizbaillie.com
Illustration by Tara Fleming
DIY Fish Pond
Thu, Jun 4, 2009
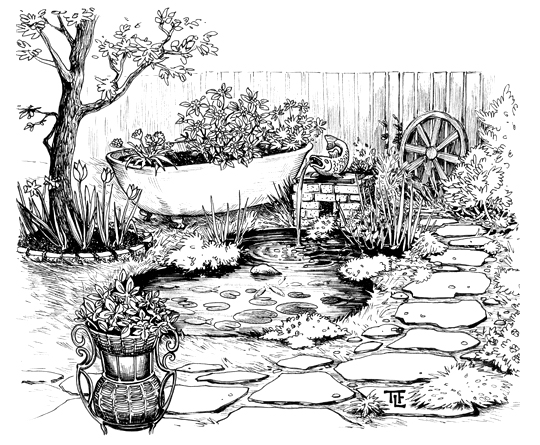
Bryhanna Greenough dislikes pet fish almost as much as that guy in The Orchid Thief.
I recently discovered I hate fish. Fish in aquariums are so depressing.
But it’s taken a long time to get to this point.
Once upon a time, a hefty, 10-year-old common goldfish glided unexpectedly into my life. He had been living in a pond in a greenhouse, and, while he was very healthy, the algae was becoming a problem and the pump had crapped out from algae overload. The water was evaporating. I had to get him out of there. So I decided to bring the fish to my apartment in town, and put him in a fish tank.
I started off by giving him a name. Then I gave him some fishy friends, and plants, and decorated the tank with overpriced pieces of imported South African wood, because I felt there was nothing sadder than a solitary fish in a bare tank.
But no matter what I did, Mr. Dingles still seemed sad and cramped.
For two years, Mr. Dingles and his gang were the focal point of my living room. The tank rested where a TV might have. Goldfish have good eyesight. They can see you. They have no eyelids. The term “fish guilt” came into regular usage around the house.
I got a bigger tank—the largest that would fit—at the cost of blocking out a window. Despite weekly water changes, a regime of live carpenters (when in season), and a fancy filter, Mr. Dingles’ kept staring at me with those accusing, depressed eyes.
This spring, I planned on returning Mr. Dingles to his original home in the pond. It’s one of those black plastic forms you can pick up from any big garden center, and it was now dry and perfectly clean. Starting a pond can be costly, and maintenance a bit of a pain, but freedom from this fish would be priceless. Pond pumps are expensive (depending on the amount of water) but that’s not the end of it. You also need a filter, preferably a UV filter which zaps the life out of algae. Without good filtration your freshly filled pond will turn green within a week and you won’t be able to see your fish (even though some people say this is okay for goldfish). Every week I set aside time to clean out the pump and filter, and top up the pond with fresh water. Part of the fun has been digging up plants from a wild pond, and researching water lilies for this water garden.
The payment is Mr. Dingles and the gang no longer swim laps, now they zip wildly in all directions. Their lives have improved. I think.
Serious fishness
James and Lang Sparks have a series of four ponds in the backyard of their home on Elizabeth Avenue. With three pumps, a huge UV filter, piped in rainwater, and about 50 lilies to help purify and oxygenate the water, the Sparks have created an ecosystem where koi actually reproduce in their back yard. James says the biggest problem is controlling algae. His advice to anyone thinking about making a pond is “be prepared for a lot of maintenance and care.” (Dammit!)
In the winter the dozen or so koi are moved to the deepest pond and a canopy is raised over the area to keep it from freezing. The fish are dormant in the winter. Once the water reached 10 degrees Celsius they rest on the pond’s floor until spring.
“This here is extravagant, but I’m retired, have lots of time, and just enjoy doing it. For someone who is working—just make a small pond,” he advises.
Excellent advice, especially if you hate fish.
Illustration by Tara Fleming

Photo by Bryhanna Greenough
How to make your bike your best friend
Thu, May 7, 2009

By Sarah Smellie.
I know you know it’s good for the planet. I know you know it’s good for your health. I know you know that here in St. John’s, we often only have three legitimately snow-free months and voluntarily spending even one unnecessary second of those months trapped inside a car is totally ludicrous.
I also know that it seems lot easier to just keep driving and leave your bike at home.
But easy doesn’t mean better. So here are a few tips on how to get yourself inspired—and keep yourself safe and savvy—to ditch your freakin’ car already, and start cycling.
Get inspired
Just look to the streets. These days, you’re very likely to see cyclists jousting with the car-bound drones at all times of the day. Observe how fabulous these cyclists look—muscled and smiling, free from the tyranny of road closures, detours, parking fees and other regulatory nuisances that drivers must abide by. Sure, the top-half-of-an-alien-pod bike helmet is a bit dorky, but they still look cooler than the chump in the SUV who’s absentmindedly picking his nose, no?
Of course, there are legit studies and stats you could have a look at. It’s a well-known fact that exercise is an effective anti-depressant. And cycling is great exercise: thirty minutes of it will burn anywhere from 200 to 550 calories, depending on your weight and speed.
The best thing about cycling, though, is that it’s not just exercise. It’s cheap and effective transportation.
Ease into it
Now, obviously, to burn all those calories, you’re going to be doing a bit of work. This might take some getting used to.
First, map out your regular route to work, school, or wherever, so that it avoids monster hills and insanely busy streets. Then give your route a few test rides. This lets you see how much time it will take, how sweaty you’ll be, and lets you experiment a bit.
If you’re sore the next day, or any day, take it easy and walk—don’t drive!—and bike again the day after that. Don’t push yourself too hard, you’ll only get discouraged. If you keep it up, your regular ride will become too easy and you’ll be looking for bigger, better rides to challenge yourself with.
Watch the weather
The weather can certainly suck. This is St. John’s, after all. But that means you probably own a rather effective set of rain gear. Well, that rain gear is just as effective when worn on a bicycle. Yes, you’ll get a bit wet. You’d get wet running to your car, too.
Avoid the hills
They’re huge. They’re brutal. They’re everywhere. But there’s usually a way around them. For example, to get out of downtown, Queen’s Road is a bit gentler than, say, Victoria Street. If you’re up for a scenic tour, taking a side street around the Alliant building and zooming up Rennie’s Mill Road will get you out quick and easily.
Of course, there’s no shame in walking your bike up a hill. I’ve walked my bike, Godspeed, up some of the finest hills in Eastern Canada—the Cabot Trail mountains, Kelly’s Mountain in Nova Scotia, that one stupid hill in the middle of P.E.I.—and it never ruined my day. I was even given a beer one night for having the good sense to walk it up Prescott Street.
Be careful
Biking in St. John’s can certainly seem like a suicide mission. The roads are narrow, some are narrow and busy, and the potholes appear bottomless. But if you plan your route and aren’t adverse to taking an extra ten minutes to use residential streets, you’ll be fine. If you have to use a busy and/or narrow street, be assertive. You are traffic, so take your space. Despite any swearing and/or obscene gestures, the cars will be fine if they have to slow down and get around you.
Feel awesome
Honestly, though, the most immediate obstacle will really be you. Some days you just won’t feel like it, and not even the thought of your hot self breezing into work/school/whatever, all rosy-cheeked and breathy, can bring about the requisite oomph. While you’re flipping your car keys off their hook, just remember: If you leave your beloved bike cold and alone today, you’ll have a much easier time leaving it tomorrow. You’ll also feel a whole lot better about yourself, whether you’re cranky at the beginning or not, if you just cowboy up and ride.
So giddy-up!
—
Illustration by Tara Fleming
DIY surviving a hard drive crash
Thu, Apr 23, 2009

Elling Lien sends you back in time to save your deleted data.
Have you ever flicked on your computer and had it casually ask you where your boot drive is? Do you know what a blue screen of death looks like? Do you know what a Mac with crosses for eyes looks like? Or, even worse, a flashing question mark?
I don’t claim to be much of a computer expert, but I’ve seen all of those things. And I’ve seen enough.
Last Monday I returned from a short Easter break and my hard drive had crashed. Completely. It was gone. I checked the connections to make sure it had failed. There was a brief moment of panic.
A few seconds later a calm washed over me, like a warm, salty ocean breeze.
Ahhh. Can you feel it?
Well, okay, maybe I didn’t have that feeling, but at least I didn’t shit my pants. I had automatic backups, and I had my system discs, so I knew it wouldn’t take too long to get everything back up and running. After a quick call to tech support to confirm everything was gone, and an attempt to squeeze a few final moments out of the drive by putting it in the freezer (no luck), I mosied on over to Avalon Software to get a replacement hard drive.
One afternoon later, and like that Robert Frost poem about the kid who saws off his hand and dies, I eventually turned back to my affairs.
Hard drives die. Some will die silently, some will die violently, some will die quickly, some will die slowly—but all of them will die. It’s a fact. The hard drive you are using now will eventually die. Likely, your hard drive will die much, much earlier than you will, and if that dead hard drive had something inside it you needed, you will be shit out of luck.
If you plan to rely on a tech person or software to pick your data from your mangled drive, I wish you luck, but, unfortunately, just like no one has ever proven to make contact with a spirit in the afterlife, it’s likely your data will just as far out of reach. And besides, like freezing your body for cryonics (starting at only $20,000 US!) data recovery is really expensive.
Thankfully, being prepared for a hard drive failure isn’t so hard.
HOW TO SURVIVE A HARD DRIVE DEATH
Items you will need:
• A time machine.
• A beer or something.
• A pen.
• A sheet of paper.
• A spare hard drive (anything from a 1 terabyte motherload to a USB thumb drive.)
• Another USB thumb drive.
• A Ziploc bag
• Some automatic backup software.
• System software discs.
Okay. So your hard drive has crashed. It’s completely and utterly screwed.
The first, important step is not to panic. The reason you are not panicking is because you are prepared. Relax. Have the beer.
Set your time machine to one month ago. Hop in.
While you’re whizzing back in time, make two lists: one with the location of the files you can’t do without (like, say, your music, or your photos, or your homework folders), and the other with the programs you can’t do without.
Now imagine how much space you’ll need to back up all your files. If the majority of what you do is word processing, accounting, or the scattered music file, you might not have to buy a spare hard drive—who knows? You might even be able to plunk all your backup data on a $20 USB drive. But on the other hand, these days a 750GB internal hard drive will only set you back around 130 bucks. Get the space you need and multiply that by two.
Now it’s time to install the automatic backup software. I’m on a PC desktop, and I use SyncBack Free because, well, it’s free, easy to use, and it does exactly what I need it to. Instead of copying the whole drive every time, it only copies the new files and the files that have changed. For just 40 bucks you can pay for a version that does more, but for now give SyncBack Free a try.
I set mine up to back up the most important files nightly (right after work) and other files weekly (on the weekend). Setup is a piece of cake.
First for the automatic weekend backup, create a new profile called “Weekly” then select the directories you want to back up once a week. Then select the destination folder on your new drive or USB drive. Then, under the Misc tab, hit the Schedule button and pick a good day and time for the backup when you know your computer will be on and you won’t be using it too seriously. (You have to enter your Windows password for this, or it likely won’t work.)
Et voila! You’ve got your weekly automatic backup ready.
Repeat for daily, or monthly, or whatever, and for the first while, be sure to check the destination folders periodically to make sure the files are copying. It may require tweaking.
If you really want to get fancy, you can set things up to FTP your files to a remote server, or sync to a service like Dropbox (www.getdropbox.com) but that’s a bit more complicated.
Now that your important files are safe, get your important programs together. Collect your installation discs from your cupboards and closets. Collect the installers for the free software you use and put that on the other USB drive. Now stick all of that in a plastic Ziploc bag with your system discs, label it DO NOT TOUCH, and put it in a safe place.
Now you’re ready to hop in your time machine and resurrect your data. Life after death!
Illustration by Tara Fleming
DIY: Cookie tin banjo
Thu, Apr 9, 2009

Sharleen Simmons turns a cookie tin into a banjo.
Banjos, ukuleles, mandolins, oh my! If you’re anything like me, you may have a slight obsession with musical instruments. To feed this addiction I often search the interweb for new, interesting, and cheap instruments. That’s where I came across the 4-string cookie tin banjo. Brilliant! I may not be able to afford all the instruments I want, but I sure can try and make them—and so can you.
First, the fun part: finding a cookie tin. Call up every granny you know. You’re bound to strike one, and maybe even get some hard candy in the process. If Nan doesn’t pull through, your next stop is going to be the local second-hand and antique shops.
Make sure the cookie tin is between 10-12’ in diameter or length. Sure, you may get some funny looks running around the store with your measuring tape—I know I did—but that’s all part of the fun. You also want to look at the sturdiness of the tin. Older tins are often made of thicker metal and are stronger. Finally, you should consider the shape. I recommend a round tin. It’s going to be less likely to warp than a rectangular tin.
When you find the perfect tin, you’ll feel an immediate “that’s my banjo” connection. Trust me.
Now for the neck. If you can find an old guitar or banjo neck, go ahead and use it. If not, you’re going to have to find a piece of wood and build your own. I recommend a hard wood—poplar seems to be popular. (Groan!)
Cut your piece so that it’s approximately 1 ½” wide, 1 ¼” thick, and about 35” long. Those 35 inches are divided as follows: The tail of the neck is the diameter/length of the tin – about 11”, the fretboard (from the top of the tin to the nut, the little piece with the grooves in it that guide the strings) should measure about 19”. Leave 5-6” for the head (nut to the top of the neck). If you’re lost with all these terms, check out this diagram at www.tinyurl.com/guitarparts.
Shape the head however you like, just make sure you have room for your four tuners, those knobs you twist to tighten the strings. Drill four holes for them – two on each side of the head, evenly spaced apart.
You can add frets if you like, but this is a little more complicated. I suggest leaving the neck fretless, or simply drawing them on.
Now let’s put it all together! I recommend using the back of the cookie tin as the front of the banjo. This way, you can access the inside of the banjo. Plus, it’s great for storage!
The first thing you want to do is cut a slot in the tin for the tail of your neck to slide through. Use a boxcutter knife and try to make this slot as tight to the neck as you can. Slide your neck through the slot so that the bottom sits on the bottom of the inside of the cookie tin. Then, secure the neck in place by driving a screw from the outside of the cookie tin into the bottom of the neck.
All you need to do now is install the tuners, tailpiece, nut, and bridge. There’s another diagram to orient yourself with at www.tinyurl.com/banjoparts.
Either grab these parts off an old banjo, guitar, or ukulele, or check the local music stores for new or used parts. They’re fairly inexpensive items.
Attach your tuners to the headstock, where you drilled the holes earlier.
Install your tailpiece at the bottom of the front side of the tin.
Place the nut at the top of the neck. The nut should stay in place from the pressure of the strings, but a dab of wood glue doesn’t hurt.
As for the bridge, I glue two pieces of grippy fabric to the tin, under the bridge. This way, the bridge will not slide around on the tin. Now, put your bridge in place just above the tailpiece, and install your strings. Tune it up, and you can start pickin’ out some tunes!
Remember, there are unlimited variations on this plan, so feel free to improvise, pimp it out as much as you like, and have fun with it! Make sure to send any pictures or videos to diy@thescope.ca.
Happy playing!
Illustration by Tara Fleming
DIY milk crate crafts
Thu, Mar 26, 2009
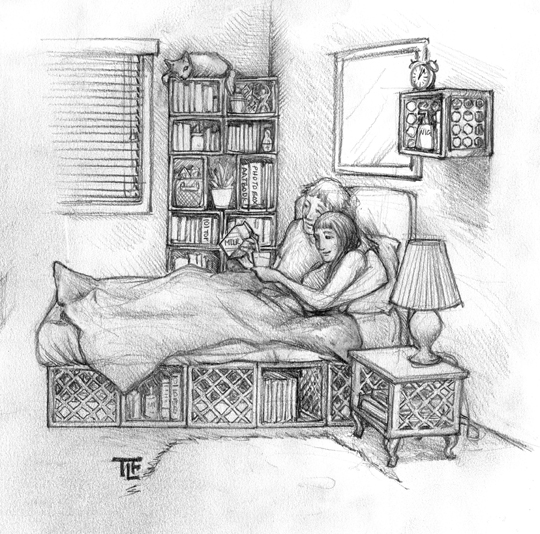
Dave Sullivan can imagine a world made entirely of milk crates. Can you?
Recently I’ve begun working in a technology lab where milk crates are being used to store everything from files to computer and robotic components. With an economic meltdown close at hand, milk crate crafts are experiencing a comeback of sorts. Below are seven items that can be made from milk crates.
—
Milk Crate Pet Cave
4 milk crates
1 extremely sharp knife
16 zip ties (cable ties)
1 blanket
Instructions
Carefully cut the bottoms out of all the milk crates using the extremely sharp knife. Line them up in the shape of a tunnel, connect each side of the crate to the adjoining side using zip ties. Take a blanket and cover the crates to create the darkness of your cave. Then it’s up to your cat/dog/rat/hamster to make the most of it.
—
Record Storage
1 milk crate
30 – 40 LP’s of your choice.
Optional:
4 pieces of masonite cut to fit the crate.
Various photos of your favorite band (mine is REO Speedwagon)
Glue (not for recreational usage)
Instructions
Take crate. Chuck albums in said crate. Bingo! You got yourself a record storage rack. For optional supplies, adjoin masonite to the sides of the milk crate, then decorate using the oft-overlooked decoupage technique of southern France.
—
Snowshoes
2 milk crates (for skinny folk, double for girth)
1 pair of winter boots
1 ball of twine
Glue gun
1 sharp knife
Snow
Instructions
Take the winter boots and tie them securely to the base of each milk crate. Slip on your boots, tie them up and away you go. You may want to try cutting down the sides of your crates by six or seven inches with an extremely sharp knife. This may make things more comfortable. For larger folk, such as myself, you need to cut out one side from each crate and fasten the crates together with both hot glue and twine. Place the boot in the center at the join and secure it to the base of the crate.
Happy snowshoeing.
—
Milk Crate Bed Frame
(Queen sized bed only)
30 milk crates (6 rows of 5)
Lots of zip-ties (cable ties)
Instructions
Layout your milk crates in 6 rows of five crates down the centre of where you want your bed to be located. Secure the crates together with zip ties. Slap your bed on there, and sweet dreams.
—
Coffee Table
16 milk crates
48 zip-ties
1 nice piece of fabric
Instructions
Simply stack two rows of four milk crates upside down on your floor. Next, stack two more rows of four on top of those crates. Zip-tie them together, complete the piece with a nice piece of fabric and nobody will ever know that there are milk crates under there.
—
Ball Hockey Mask
1 milk crate (blood red… for terror!)
1 baseball cap
1 glue gun
1 glue stick (for the gun)
1 extremely sharp knife
Instructions
Using the knife, carefully cut out enough plastic from the side (pick a side, any side) of your crate. Get an adult to glue the baseball cap to the top of said crate. Sick it on your head and away you go!
—
Milk Crate Laptop Bag
(13” or less)
1 milk crate
1 shoulder strap
1 neoprene sleeve
1 extremely
sharp knife
6 zip-ties
1 glue gun
1 glue stick (for the gun)
nylon (optional)
measuring tape
Instructions
With the milk crate sitting open side up, measure two inches from one of the sides without a handle. Cut straight through the crate at the two-inch mark, you are now left with a small cross section of the crate. Next, cut the opposite face off the crate (only the face) so it is a flat surface. Glue the removed face onto the two-inch wide section you cut earlier—this should form a slim box without a lid. Reinforce the gluing with zip-ties to be on the safe side. Connect your shoulder straps to either side of your box. Slip your laptop (13” or less) into your neoprene sleeve. Put the sleeve in the box and there you have it, a milk crate laptop bag! If you wish you can glue gun nylon fabric around the inside of the crate bag for extra protection.
Stay safe!
Illustration by Tara Fleming
DIY Etsy shop
Thu, Mar 12, 2009
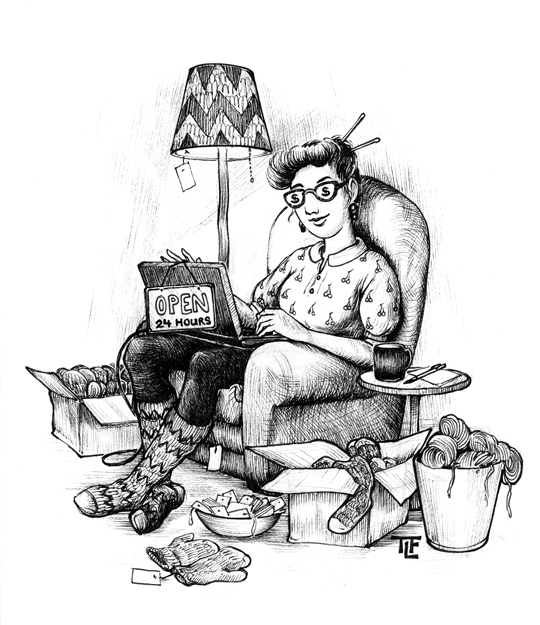
Corner Brook-based fibre artist Shawn O’Hagan spins a yarn about setting up shop online at www.etsy.com.
I’ve always been a painter, but in the past 10 years I’ve turned my attention more to textile arts—hooked mats and sewn vintage chenille clothing for children—and these days, my focus has been almost exclusively on hand-spun yarn and knitwear. I realized that in order to make a living from my work with wool, I would have look off the island for my market. After all, everyone and their nan can knit here, and are willing to sell an exquisitely knit pair of socks for just 12 bucks! So about a year ago, I set up shop on Etsy, an online craft market.
Since then, I’ve sold almost a hundred items to people from Canada, Europe and the U.S that otherwise would be sitting in my studio.
Most of my customers are individuals, although last year a woman opening a shop in Vermont bought a dozen of my scarves for her store, and lately, customers have bought my yarn and commissioned me to knit scarves from the skein they buy. I now even have a number of repeat customers for my yarn, so I get to know a little about their lives through our e-mails back and forth.It’s exciting not knowing what the next step will be.
The idea of setting up my own website was daunting, so when I first read about Etsy in a Globe and Mail article, I checked it out. It’s sort of like eBay, but it’s only for handmade products, craft supplies, and vintage vendibles. And there’s no bidding. You set a fixed price for your item.
I started buying on Etsy first, that’s where I got my first drop spindle! It helped me get used to how it worked from a buyer’s point of view, and I now do almost all my shopping for supplies on the site. It’s a great feeling to buy handmade work from people like me.
Anyone can set up an Etsy shop. The set-up costs nothing, and it’s simple to do. First, go to their website at www.etsy.com and click on ‘Sign In.’ There’s a ‘Sign Up Now’ button for non-members, and from there, it’s just like setting up an e-mail address with Gmail. Etsy provides you with tons of information and easy-to-follow instructions about establishing your store. I spent a lot of time initially on the Etsy site, reading all I could on the “how-to” pages, and visiting the various forums to get to know other sellers and have them get to know me.
Once you’re set up, it costs 20 cents to list an item. When you list the cost of an item, you also estimate the cost of shipping and the customer pays up front. If you make a sale, Etsy takes 3.5 per cent of the cost of the item.
Most exchanges are through Paypal, an online banking system which keeps your credit card or bank account number so you don’t have to give it out to the people you buy from. It keeps things safe and easy. When someone buys an item from me, they pay Paypal, who, in turn, pays me.
You need to keep the feel of your shop fresh, and I think the reason people fail on Etsy is because they are neglectful. www.islandsweet.etsy.com is my shop, and I treat it seriously, spending about an hour working on it every day.
It’s important to add new products often. It takes me about ten or fifteen minutes to list a new item, and this includes taking photographs. Good photographs are essential. Every day, a few times a day, I also renew an item. Each renewal costs 20 cents, but a renewal puts your item back up onto the top of the list. If a potential customer types in, say, “art yarn,” my item will be on the first page or close to it.
I’ve made some wonderful Etsy friends. Etsy has groups or teams that you can join, and the information passed around in the fibre arts team has been helpful and encouraging. And since I’ve been buying much of my fibre for my yarn online, I’ve been able to arrange trades with other Etsy sellers. Just recently I traded two hand-knit shawls for almost $300 worth of hand-dyed fibre from a seller in Taos, New Mexico. The colours carry the desert with them.
Etsy makes it possible for me to stay home in Corner Brook and open up my shop to the world.
Illustration by Tara Fleming
DIY CD cases
Thu, Feb 26, 2009

Mercy, The Sexton’s keyboardist and design guru Duncan Major has got you CD-covered.
Forget download cards, vinyl records, cassettes and online distributors. For the unsigned, empty-pocketed band with a finished album, the Compact Disc remains king of the cheap release. With access to a CD burner, a printer, scissors, and a few dollars to purchase CD-Rs and their accompanying jewel cases, you’ve got the means to release an album all by yourself.
But, pffft, jewel cases – they are so industry. There are definitely better ways to creatively and inexpensively house your sonic gold.
Cheaper, easier to make cool, and somewhat “greener” than plastic is paper. With paper cases, a lot can be accomplished with little more than an X-Acto knife, glue and some manual labour.
An easy, but unsuspectingly slick method to make a stand-out CD case is to fold copy paper around your disc so that it holds together without tape or glue. There are numerous ways you can pull this off. Papercdcase.com gives folding instructions for a neat case with an origami twist. For a rushed release, the site also provides a type-in-your-band-name-and-track-listing feature which lets you print out a prefab cover all ready for folding. All they ask in exchange for their guidance is a mixed CD, preferably mailed to them in a folded case of their design.
Some of the coolest paper cases out there have “beak” designs that hold the disc in a pop-up form. You can find lots of templates for these online. There’s a good video of one here at tinyurl.com/dx98b3. This one requires a thicker, sturdier paper.
But there’s really no end to the shapes and forms that your folded case can take on. The Satans set a new St. John’s standard recently by releasing a CD encased in a well-engineered paper coffin. In the past, Sound Salon placed discs in a kimono-like paper structure to go with their gift certificates.
If you have the time to cut, fold, and glue, you might consider making a simple pocket design similar to an LP sleeve, using copy brand card stock. But really, the best advice I can offer is to find a case you like, take it apart to see how it’s made, and then copy the structure as best you can. When making Mercy, the Sexton’s CD cases, for example, I gaffed the structure from a dissected Matt Mays album.
A caveat: When making your cases be aware that paper has a grain running one way – usually lengthwise – and folding against the grain can cause heavier papers to crack along the crease. When using thicker papers or card stock, you’ll need to score your paper first. This involves using a bone folder, or a knitting needle, or something with dull rounded point, to make a depression down the line you want to fold across. When making your score marks and cuts, use your mom’s quilting ruler instead of a regular one. It’ll make your life a lot easier.
Of course, the fewer CDs you’re releasing, the more far-out you can make the cases. Materials like door hinges, duct tape, staples and bolts are all useful to the DIY CD case maker. You could stitch a fabric CD pocket and rubber-stamp or stencil the cover. Or use found objects—secure some airsickness bags from your friend who works at the airport and modify them; extract the CD trays from old cases and glue them to squares of spray painted cardboard; go to Princess Auto and check out the surplus section. Wacky cases guarantee to be immediately thrown out or saved forever, becoming coveted rarities in the future. Just make sure you do a test case before securing your mountains of junk.
Once you’ve nailed down your style of packaging, you might want a cover graphic. For mass production, photocopiers and printers make for the least time-consuming way to replicate images. But for a true handmade aesthetic, depending on what you can get your hands on, there’s screen printing, stenciling, spray painting and block printing to consider.
There are setbacks to the wholly handmade approach. If you intend on having your release in stores and in radio stations, regular jewel cases with spine labeling are preferred because they are easier to catalogue. And if you’re producing more than a few dozen copies of your disc, the thought of constructing each case by hand becomes less appealing. With all the bargain bin All Saints and Color Me Badd CDs at Value Village, I’ve been wondering if anyone has the chops to do something like what the legendary Newfoundland punk outfit Da Slyme once famously did—gather up empty promotional and commercial LP sleeves and spray paint their name over the the cover of each jacket. There you have it—a readymade bang for an easier buck.
Illustration by Tara Fleming
DIY cold remedies
Thu, Feb 12, 2009

Bryhanna Greenough is sick of being sick.
After three healthy winters, I’ve become a cold magnet. It’s been relentless. The runny nose of one infection turns into another sore throat and the cycle of snot and suffering repeats itself. I’ve rested, bobbed in a bath, chugged gallons of juice, and mega-dosed on Vitamin C to the point where my tongue is orange for days. There was a denial period where symptomatic support options were completely ignored. Then a new battle broke out, and I broke down and splurged on $25 bottle of hope in the form of Cold FX.
I did start getting better, s-l-o-w-l-y, but I want to believe my body is strong enough to get over this vile treachery without a trip to the doctor for antibiotics.
I just can’t stop a common cold from treating my body like a cheap hotel room.
As you probably all know, the common cold is a virus, and the experts say all you can do is treat the symptoms. And, unfortunately, nothing really seems to work that well. That said, it’s always interesting to learn what others do, and have done, in their desperate search for a little relief. A handful of Scopemakers called up their families for traditional home remedies for seasonal sickness and recalled memories of friends and neighbours helping them fight the common plague. If nothing else, it was a good excuse to finally get around to calling. As you can see I’ve lost all hope. But here you have it.
Chicken soup is the comfort food of the masses. It sells books, and, supposedly, cures colds too. It’s filled with all sorts of vitamins and it’s easy on the stomach when you don’t feel like eating very much. Editor Elling Lien’s mother Judy Lien remembers friends bringing soup by the house.
“It’s a wonderful gift for any family going through colds,” she says. And it’s true, a few spoonfuls of salty, brothy goodness lifts the mood and re-affirms life.
Cartoonist Tara Fleming puts a twist on the Vicks VapoRub standard by smearing it onto the bottom of a bowl, and then very carefully adding hot water. She makes a tent by draping a towel over her head, closes her eyes and inhales the steamy camphor, eucalyptus and menthol to relieve congestion.
“Though if you don’t close your eyes you may experience temporary blindness,” says Tara. “Hey, my grandparents weren’t doctors!”
(Vicks also warns against this because so many people have been burned in the process!)
Journalism intern Ross Mair has experienced some bizarre home remedies in his lifetime. His old neighbour on York Street claimed wrapping your left sock around the neck and securing it with a pin before bed would cure a sore throat. Luckily, he was too young to remember. These days he digs the hot water bag, “an instant cure-all for all things muscle related, and without the smell, hassle and burning of Tiger Balm,” he says.
This is off-topic, but Ross also has an incredible antidote for nasty tooth pain: Microwave a ceramic plate to burning hot, wrap it in a thick cloth and lay down pressing the sore side of your face into it. Bah! Who needs a dentist anyhow?
Goose grease is the cold remedy of choice for Sydney Blackmore’s family in Grand Falls-Windsor.
“Whenever a goose was prepared for a special family meal, the grease drippings were kept to be used as a decongestant,” says her mother about her grandfather’s Sidney Butler. The grease was applied to the chest to relieve congestion in the lungs, and a few drops of camphorated oil were also used in this way.
Black currants, those tasty little temptations growing on bushes in backyard everywhere, are also a traditional Newfoundland home remedy. Sydney’s family ate homemade black currant jam to ease the pain and swelling of a sore throat. Elling’s mother is also convinced of the benefits, claiming black currants are high in anti-oxidants. One year she canned her own black currant juice, the reinstated it by mixing it with some water and heat. She says you can also use frozen black currants to make juice by heating them with some water on the stove, then straining them.
Last but not least, I called my grandparents and ask them about their home remedies for colds. My grandpa says if you’re fairly healthy your body can fight it off. His words exactly, “suffer it out.” And if you can, don’t go to bed, because you’ll just feel worse. No rest for the wicked.
Illustration by Tara Fleming
DIY: Drum kit
Thu, Jan 29, 2009

Drummer Alex Pierson teaches you how to make your own kit.
So the RPM Challenge is upon us once again, and you’re going to need some drums, pronto. Assembling a homemade drum set may seem like a big deal, but it’s actually pretty easy. C’mon… it’s not like you’re making a set of stairs or anything. Really, the hardest part is going to be explaining to the neighbours what the ‘cursed racket’ is all about. All it will take is an afternoon, and a few items that you have kicking around.
Before you set out, keep in mind that many before you have created decent sounding drum sets from household items, and I am willing to bet you’ve heard a record or ten that features some sort of unconventional percussion instruments. The band Elliot Brood, for example, have destroyed many a suitcase in the throes of live performance.
To build your own kit, all it takes is lots and lots of imagination—all hot-glued and duct-taped together.
First things first: the bass drum. The heartbeat. The foundation. It is surprisingly easy to fashion a decent sounding bass drum from a large cardboard box with the lid taped shut. Even an old hard-shell suitcase, or a round plastic garbage can with cardboard cut to the size of the lid will do wonders. And just think: if you’re bringing your new kit to a jam, (or even better, a gig) your bass drum can double as a carrying case. Word!
The tangly part of the homemade bass drum is the kick pedal, and this is the only ‘real’ component that I recommend you buy, since building one is tricky and time-consuming. It’s definitely possible to rig something up—but given the amount of time you are likely to spend creating one, you may as well invest $20 at the pawn shop. I promise you’ll be happy you did. However, if you are bent on assembling one from scratch, there are many internet sites that’ll teach you how. Or feel free to e-mail me and we’ll talk (alex@thescope.ca.) There just isn’t enough space on this page to do it justice.
Whichever route you decide to take, the next step is to attach the pedal to the bass drum. If you’re using a cardboard box, this is easily done with a strip cut from one of the cardboard flaps, taped to the bottom of the drum, protruding out a foot or so, long enough so that you can stick the pedal to it. If you are using a suitcase, you may have to screw a small piece of wood on to the bottom, just so the pedal has something to clamp on to. Also, if you are using a cardboard box, you may want to reinforce (read: duct tape) the place where the beater of the pedal makes contact with the drum so as not to compromise the integrity of your delicate instrument. To change the texture of the sound, you can wrap the beater in some fabric. A sock works well. This’ll also help the drum last longer.
Next, the snare. Any large plastic bucket, turned upside-down will work great. Tape some sheets of old newspaper to the top if you want a decent ‘buzz’ sound. You can also get all kinds of different sounds by lifting a side of the bucket off the ground while playing. Ideally, you want something that you can position between your legs, something tall enough to wail on while sitting comfortably.
From here, things get a little more open-ended. The other drums, or toms, can be made from smaller buckets, or if you are still feeling adventurous, throw together a couple of log drums for yourself. Here all you need is plywood and finishing nails. The size is up to you, as long as you have the four sides, and it should be fairly long, like a rectangular prism. Seal one of the ends shut for maximum logarithm…
Cymbals? Bah! Who needs ‘em when you have trash can lids, stainless steel bowls, pots, pans, baking sheets, and…well, you get the idea. Mount these on top of your box (like a real trap set), or hang them from the ceiling like they used to do back in the day. A quick and easy cymbal stand can be made by taping a broomstick to the side of your box so that it points to the ceiling. Insert a screw in the top, and mount your ‘cymbals’ pro-style. Just be sure to get Mudder’s permission before putting holes in her bakeware.
On top of all this, there’s what you might call the auxiliary—the shakers, the rattlers, the proverbial can o’beans. Tape a couple tambourines to your non-bass drum leg and tuck a shaker into your sock in the place of a high hat. You are only limited by your imagination, and how many shakers you have on hand.
As always, the important thing is enjoy yourself… And be sure to send us audio or video samples at diy@thescope.ca.
Illustration by Tara Fleming
The year in DIY
Fri, Jan 2, 2009

This year the DIY section featured a wide cast of guest columnists. The mission was simple: Teach us one thing you know how to do well. The topics weren’t always practical, but certainly amusing. Holes were dug, fires were lit, drag queen makeup was applied, and stairs were built.
Bryhanna Greenough looks back at the year of D.I.Y.
Marry yourself
Right in time for Valentine’s Day, Berni Stapleton and Diane Weston share how they escape the tyranny of coupledom. They have married themselves.
“I hardly ever quarrel with myself, have only had to have couples counselling once, never take myself for granted, and I always buy myself gifts on special occasions,” say Berni Stapleton.
We caught up with Diane while she was preparing a special dinner for herself. Her reasoning was simple: “If it makes you happy doing it for someone else, why not make yourself happy doing it for yourself?”
—
Bend circuits, make noise
Craig Squires of local music improv group The Black Auks cracks apart Speak and Spells and other secondhand electronics and modifies the circuitry in an attempt to make weird new sounds. In our session we encountered the dreaded ‘black blob’ and triggered a mechanical bend (ie. Furby went crazy.)
—
Go on a fast
Meranda Squires talks about giving the body a rest from digestion so it can clean and repair itself. At the Lotus Centre, she leads groups on three day fasts. “For me there is hardly a difference between eating and not eating,” she says. But fasting can be pretty intense for some, she says. She calls it a “food addiction.”
—
Grow sprouts
Laugh in the face of winter by growing alfalfa, clover, radish, kamut, canola, sunflower, adzuki, fenugreek, and broccoli raab in countertop mason jars. Jars of green nibbles and bobbly bits will be popping apart like mad, their mass doubling every couple days.
—
Remember names
We all have our strategies for getting around this one.
“Wait for someone to use it aloud in conversation, discreetly ask someone else, go through their mail and look for anything not addressed ‘occupant,’ or give them a nickname so you don’t need to remember their real name.” Wise words from Geoff Younghusband.
—
Make a time capsule
Sherri Levesque reminisces on the buried cookie tin filled with New Kids on the Block trading cards, grocery flyers, letters from Grade 5, and the reunion that resulted ten years later to dig it all up.
—
Extract lead from soil
Much of the downtown core exceeds the Canadian ‘safe’ level of lead in our soil by eight times. Alison Dyer talks about detoxifying with plants and building raised beds.
—
Make a podcast
Local podcasting hero Wankergirl (aka Dana Hawco) teaches some basic life skills to the 21st Century non-geek. On Podcasting: “All I know was that I had some stupid things to say and I needed somewhere to say them.”
—
Run a road race
Sarah Smellie trains for the infamous ten mile running race from Octagon Pond to Bannerman Park. “You’ll get to the point where, after you’re all warmed up, you can think about something other than your burning leg muscles, like the music you’re listening to, or the book you’re reading, or whether or not today is the day you’ll ask that special someone to try and bounce a quarter off your arse.”
—
Tour by hitchhiking
Forget a van. Two-man music act Ghosts of the Highway use only their thumbs to tour across the country. Words of wisdom: “Never under any circumstances accept a ride to the following places: Wawa, Ontario; Keremeos, BC; or Sintaluta, Saskatchewan. They’re on the shit list for being notorious dead zones.”
—
Set up a micro radio station
Eastern Edge Gallery becomes the site of a temporary radio station emitting live sonic montage.
“When radio was first invented,” says Kristen Roos, “it was in the hands of the people, there were no laws governing how it could be used. Pirate radio movements, which focus on putting radio back into the hands of the people, first sprung up in response to this control in the sixties and seventies.”
—
Make an ugly stick
“What if you are like me and can’t fiddle, or whistle, or rock? We are people known for being as musical as we are handsome, and I don’t want to be overlooked,” writes Jason Sellars. His solution: “Get noticed getting ugly… by rocking out on an ugly stick.”
—
Make a backyard garden
Jason Sellars produced his own produce by nailing containers to a salvaged door, filling them with soil and seeds. “This year I’ve grown myself an edible door,” he writes.
—
Promote your music
“The world is a sprawling maze of opportunities and dead ends,” says musician Neil Conway. The best way to do anything is to consider things carefully. “There’s no limit to what you could be doing right now, but before you do anything, think about it, talk about it, argue about it, sleep on it, and then think about it some more.”
—
Build stairs
Dave Sullivan teaches us how to build a set of stairs and revises some definitions along the way…
“Nosing: That part of the stair you trip up on when you come home loaded at your mudders. It pokes out like a big old snotbox.”
—
Be a drag idol
“You’re also gonna wanna add some knockers to your outfit. Every queen has her own size and substance—I like socks. They give me about a C cup and are guaranteed to stay perky. But not too perky,” writes Matthew Sheppard aka Lola Lucci. Other wise words: “In drag world, more is more, so keep caking on the blush and eye shadow.”
—
Find vintage chic
“If you find the perfect leather jacket for ten dollars, your life might change: your co-workers might respect you, and that cute barista may slip you extra foam—at no charge,” pines Jill Butler.
—
Rock out
Dave Sullivan on how to get ready for a rockin’ 80s tribute show: “Ladies? Yeah, I’m talking to you. I hope you’re in shape. ‘Cause I got three words for you: tease, tease, tease. Get those biceps flexin’ and get that hair higher than Atlantic Place. I want that hair so high planes are going to have to radio in to ask for permission to go around it. I want that hair so high that Google Earth can pick up each and every one of you at that concert.”
—
Tell stories to kids
“Tell more stories to kids,” says Kevin MacKenzie. “Whenever a storyteller gives a story, a different illustration appears between every pair of ears in the room.”
—
Winterize your bike
On days where 40cm of white stuff dumps all over the city, “making roads into one lane quagmires of cars and pedestrians” you can find Rob Sexton riding around Quidi Vidi Lake or Mundy Pond on the fresh white snow. One of his favourite tricks? “Carry a lighter. You can use it to unfreeze parts. Just don’t melt anything.”
—
Burn mp3s to tape
“Like stuff you see in infomercials, my ‘tape burner’ is based on cutting edge, space age technology,” writes Kerri Breen. “Or conversely, ancient wisdom kept secret for years and not available in stores.” Kerri takes the digital and makes it anolog, all in the name of having a great cassette for a trip in an older car.
—
Light a fire
Paul Warford teaches us how to build a fire, have fun, influence friends, and impress lovers. While researching wood what doesn’t burn here, he talks about something called ‘old var.’ “I’m not sure what that may be, but if you ever encounter someone selling it by the cord for a price that seems too good to be true, move on.”
Illustration by Kira Sheppard.
DIY: Skype-ology
Thu, Dec 18, 2008
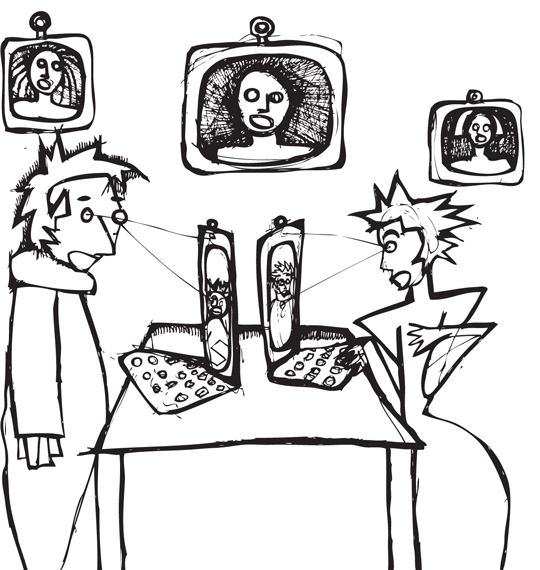
Dana Hawco teaches you to reach out and touch someone… using the power of the interweb.
Christmas is that time of year when you make those big attempts to spend time with family, friends or that special someone. Unfortunately, sometimes the most awesome of people live in most of ridiculous of places. Like Sweden, or Baltimore, or Grand Falls. These people miss out on the unwrapping of gifts, the “special” spiked eggnog and the inevitable tipping over of the Christmas tree.
But don’t fret, because there is an easy way you can talk to friends and family that live in far away lands. All you need is a computer, a mic (maybe a web-cam) and an internet connection.
Skype has been around for approximately five years. Simply put, Skype is a piece of software that allows you to make telephone calls over the Internet. But what makes Skype really cool is it allows you to hook up your web-cam and actually see the person you are talking to.
So pour yourself a glass of that “special” spiked eggnog and turn your computer on…
The first thing you need to do is to head over to www.skype.com and download the latest version of Skype. They have versions for both Mac and PC, so everybody can take part in the geeky fun.
When the download is done, give the file a solid double click and the Skype setup wizard will appear like magic and guide you through the rest of the installation. After the program is installed you will need to set yourself up with a Skype name. To do this, you will need to start up Skype and click on the “Don’t have a Skype name?” link. Once your account is created, Skype will automatically log you in and you’ll be one step closer to making your first call. Woo!
It would be a good idea to check to see if your mic or web-cam is in working order. You can check your settings under your Skype Preferences. I also highly recommend having a set of headphones. Headphones will give you better sound quality and they block out any annoying voice echo that might occur without them.
So if your best friend John uses Skype as well, all you need is his Skype name and you can give him a call—for free! Additionally, you could call any landline or mobile phone through Skype. This service does cost money but its way cheaper compared to regular long distance prices. Find out more on subscriptions and pricing here: www.skype.com/prices/
The next step in this process is to add a contact to your contact listing. Click on the “Contact” menu and choose “Add a contact”. This option will allow you to search for a person by name, location and even language or gender. When you find the person you are looking for, click on their name and choose “Add as a contact”.
Once you do that, you will see that they are added to your main contacts listing. This listing will show you if this person is online. Additionally, it will tell you if they have a web-cam. When you click on the person’s name you can either choose the little speech balloon to send them an instant message or you can click on the telephone icon and give them a call.
If a person decides to call you, Skype will alert you with a sound and you can choose to accept the phone call or ignore it. Do note that sometimes random strangers like to call people up to have chit chat. But also be warned that sometimes people can call for a little random “naughty” talk. No matter the topic of the conversation—if you don’t feel like talking, Skype works just like a phone and you can completely ignore the call.
Once your friend answers one of your phone calls, a new window will appear on your screen. This window lets you know that a call is in progress and it gives you the option to mute or pause the call. As well, if you click on the little “camera” button, it will alert your caller that you want to start a video conversation with them. Once they hit “accept” on their end, they will be able to see you.
Skype is a great piece of software but with all greatness comes a little crapness.
Speaking on Skype is a little odd, and it will take some getting used to. There can be a delay in the sound and in the video. As well, sometimes calls get disconnected or the quality is just plain bad. But no worries—if the sound or video quality isn’t the best, simply hang up and call the person again. Usually calling back and getting a new connection can fix up those pesky problems.
So there you have it. A few simple steps to the best Christmas gift of all… great conversation.
Illustration by Kira Sheppard.
DIY: Light my fire
Thu, Dec 4, 2008

Paul Warford teaches you how to burn shit.
Have a few table legs you’re not using for anything in particular? Are you sick of pretending to recycle your cardboard and old copies of The Scope?
Why not burn ‘em? (more…)
DIY: mp3 to tape burner
Thu, Nov 20, 2008
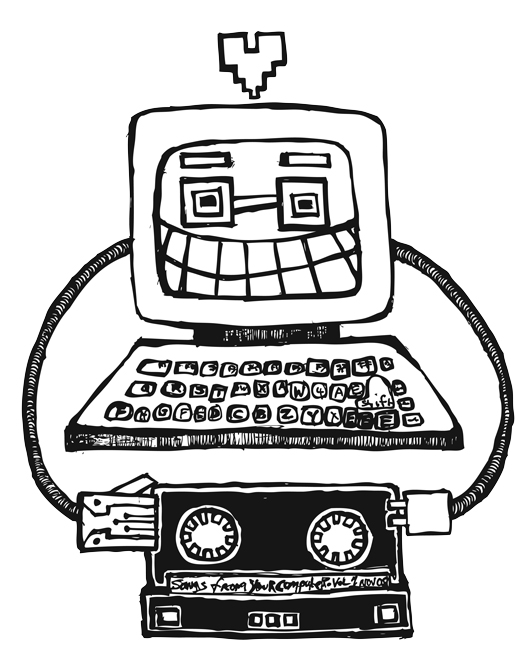
Kerri Breen shows you how to make mixtapes directly from your computer.
Want to indulge in a little analog nostalgia? Make your lover a mixed tape? (That you didn’t have to waste a CD-R to make.)
Follow these easy steps to build my mildly anachronistic but totally fun mixtape-maker that allows you record to cassette from a computer. (more…)


Thu, Jul 16, 2009
Jennifer Barrett